Unit Creation Guide
This guide walks through the basic setup for creating a unit or animated object with the SR-ImpEx Blender plugin.
Before starting the unit-specific setup, first complete the shared base scene and mesh setup from the Object Creation Guide. After that, continue here with the unit-specific steps.
Before You Start
A unit or animated object needs:
- an armature in Blender
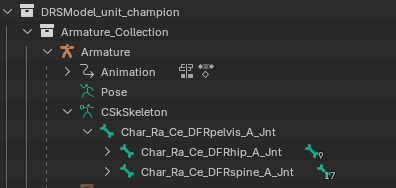
- a skeleton
- a skin with bone weights
Bone weights are stored through vertex groups, and each vertex can use up to 4 bone influences.
1. Set Up the Required Locators
A unit also uses locators.
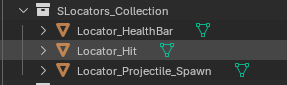
At minimum, a unit needs the following three locators, which can be added through the CDrwLocatorList Editor in the DRS Editor side panel:
HealthBar: position of the in-game health bar, usually not bound to any boneHit: used for enemy-to-unit hit calculations, usually bound to a boneProjectileSpawn: used for melee hit origin or as the spawn point for projectiles and effects, usually bound to a bone
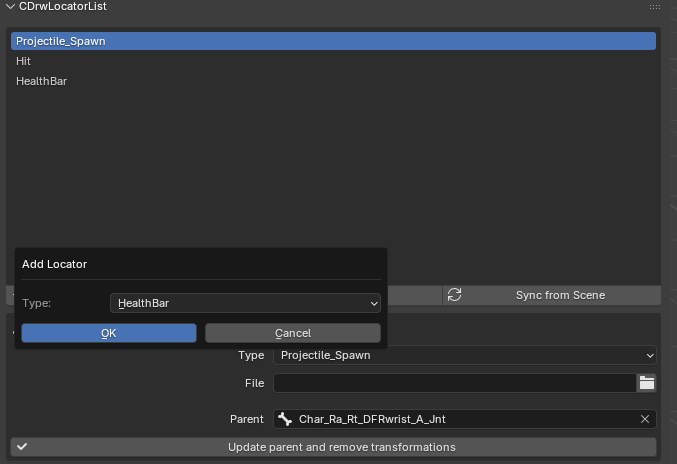
The locator controls work as follows:
Add/Remove: add or remove locatorsSync from Scene: refresh the UI after moving locators in the 3D viewType: see the Advanced Locators Guide for more detailsFile: see the Advanced Locators Guide for more detailsParent: binds a locator to a bone so it moves with the bone; if left empty, the locator stays relative to the modelUpdate Parent and remove transformations: use this after binding a locator to a bone and moving it in space to save the result correctly
2. Understand Units vs. Animated Objects
A unit usually has multiple animations. An animated object usually only has one animation, typically an idle animation with one or more variants.
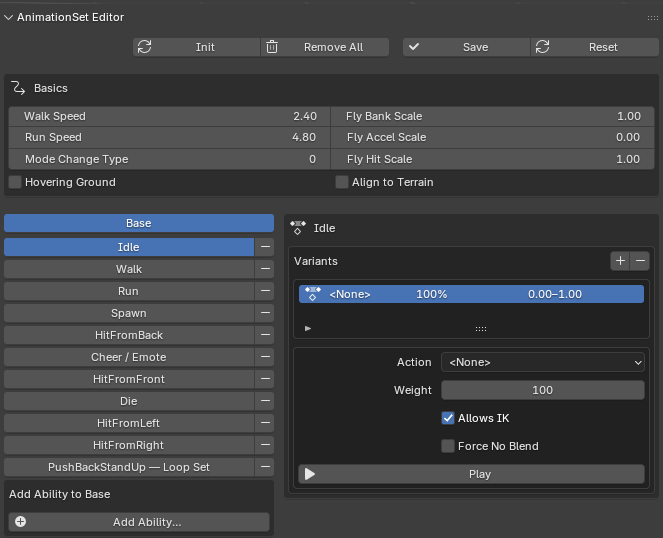
The minimum useful animation setup for a unit usually includes:
IdleWalkRunSpawnHitFromBackCheer/EmoteHitFromFrontDieHitFromLeftHitFromRightPushBackStandUp (Loop)
Loop animations have three parts: start, loop, and end. The loop section should be the repeated part. A good example is a unit being pushed back continuously by wind and staying inside the same repeated motion.
There are many more animation types available. For the full list, check the AnimationSet Editor.
3. Add Animation Variants
You can create multiple variants for the same animation and assign a weight to each one.
For example, if you want two idle animations and one should play most of the time, you can assign weights like this:
- default idle:
80 - special idle:
20
The weights should add up to 100.
Other important settings:
Allows IK: usually left enabledForce no blend: usually left disabled
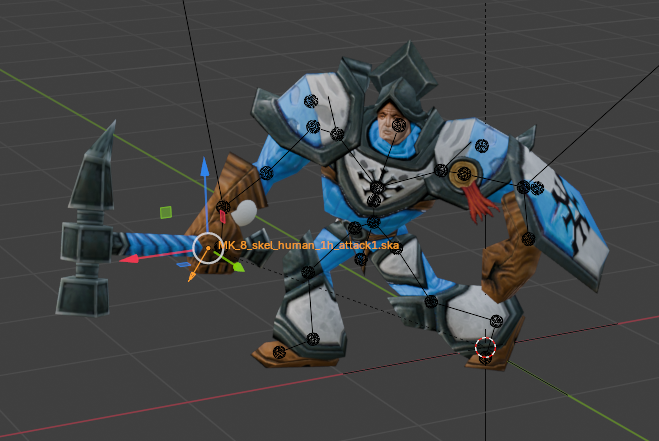
For a melee unit, the minimum additional animation requirement is an Attack animation.
4. Add Markers for Important Animations
Some animations, especially Spawn and Attack, need a marker.
The marker determines when the important gameplay event happens:
- for
Spawn, it marks when the unit becomes controllable - for
Attack, it marks when the hit should begin calculating
Everything after that point is usually just recovery, follow-through, or visual polish.
For example, if a spawn animation lasts 5 seconds, you probably do not want the player to wait the full 5 seconds before the unit can be controlled. In that case, the marker could be set to something like 0.6.
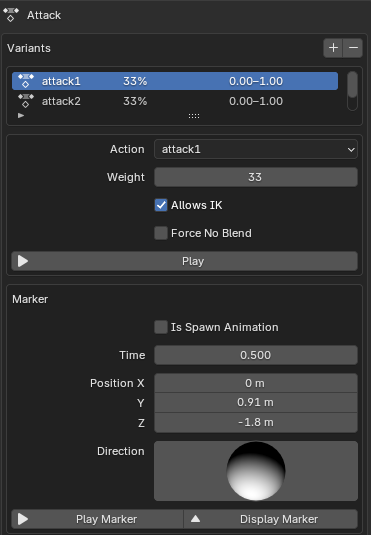
Useful marker tools:
Display Marker: previews the animation at the selected marker timePlay Marker: plays the animation until the marker time so you can fine-tune the timingXYZ: sets the exact 3D marker position
The marker position is where hits, effects, or other gameplay events begin. Good positions are the tip of a sword, the middle of an axe blade, or the hand itself.
Often this ends up being the same position as the ProjectileSpawn locator.
For more animation types such as spell casting or ranged attacks, check the Advanced Abilities Guide.
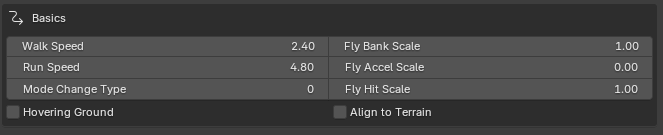
5. Configure Basic Unit Settings
In the upper section of the unit editor, you can configure basic values such as walk speed, run speed, and additional settings for flying units.
Some of these values still need further investigation.
6. Add Audio and Effects
EffectSet is used for sounds and effects. There is a separate Advanced Effects Guide for the full system.
For the basic workflow, it is enough to look at audio for Attack and Spawn.
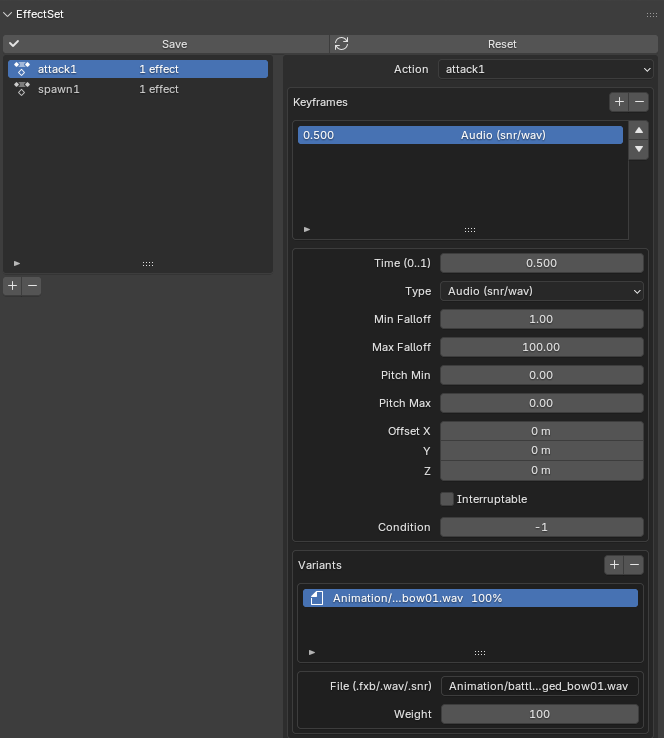
The time value uses a normalized range. This lets you place sounds to match important animation moments. For example, a hit sound can be placed at the same normalized time as the hit marker.
For the remaining values, refer to the Advanced Effects Guide.
7. Export the Unit
For export, choose either Animated Object or Animated Unit.
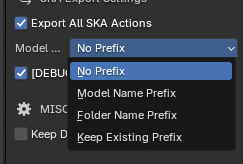
Recommended export settings:
- enable
Export all SKA Actions - enable tangent export for smooth animations
- use the default naming convention, which is usually
model name prefix
8. Final Export Result
After exporting, you will find the following files in your export folder:
.drs.dds.ska