Object Creation Guide
This guide walks through creating a new object from scratch for the SR-ImpEx Blender plugin.
Before You Start
- Install the plugin in Blender.
- There are two common workflows:
- Start from an existing model and modify it.
- Start from scratch.
- This guide covers the from-scratch workflow.
1. Create a New BattleForge Scene
Go to File > Import > New Battleforge Scene.
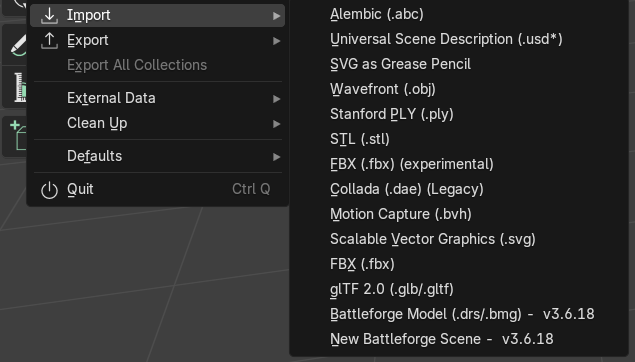
A file browser window will open. You can ignore that part for now and instead use the options in the right-hand sidebar.
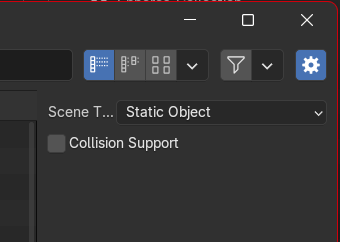
Select the object type you want to generate. For this tutorial, choose Static Object.
Below that, you will find a checkbox for collision support. Collision is only needed when the object blocks or interrupts units, such as a stone or a tree. Objects like bushes or grass are usually pass-through and often do not need collision at all.
For this tutorial, enable collision support so the full workflow is covered.
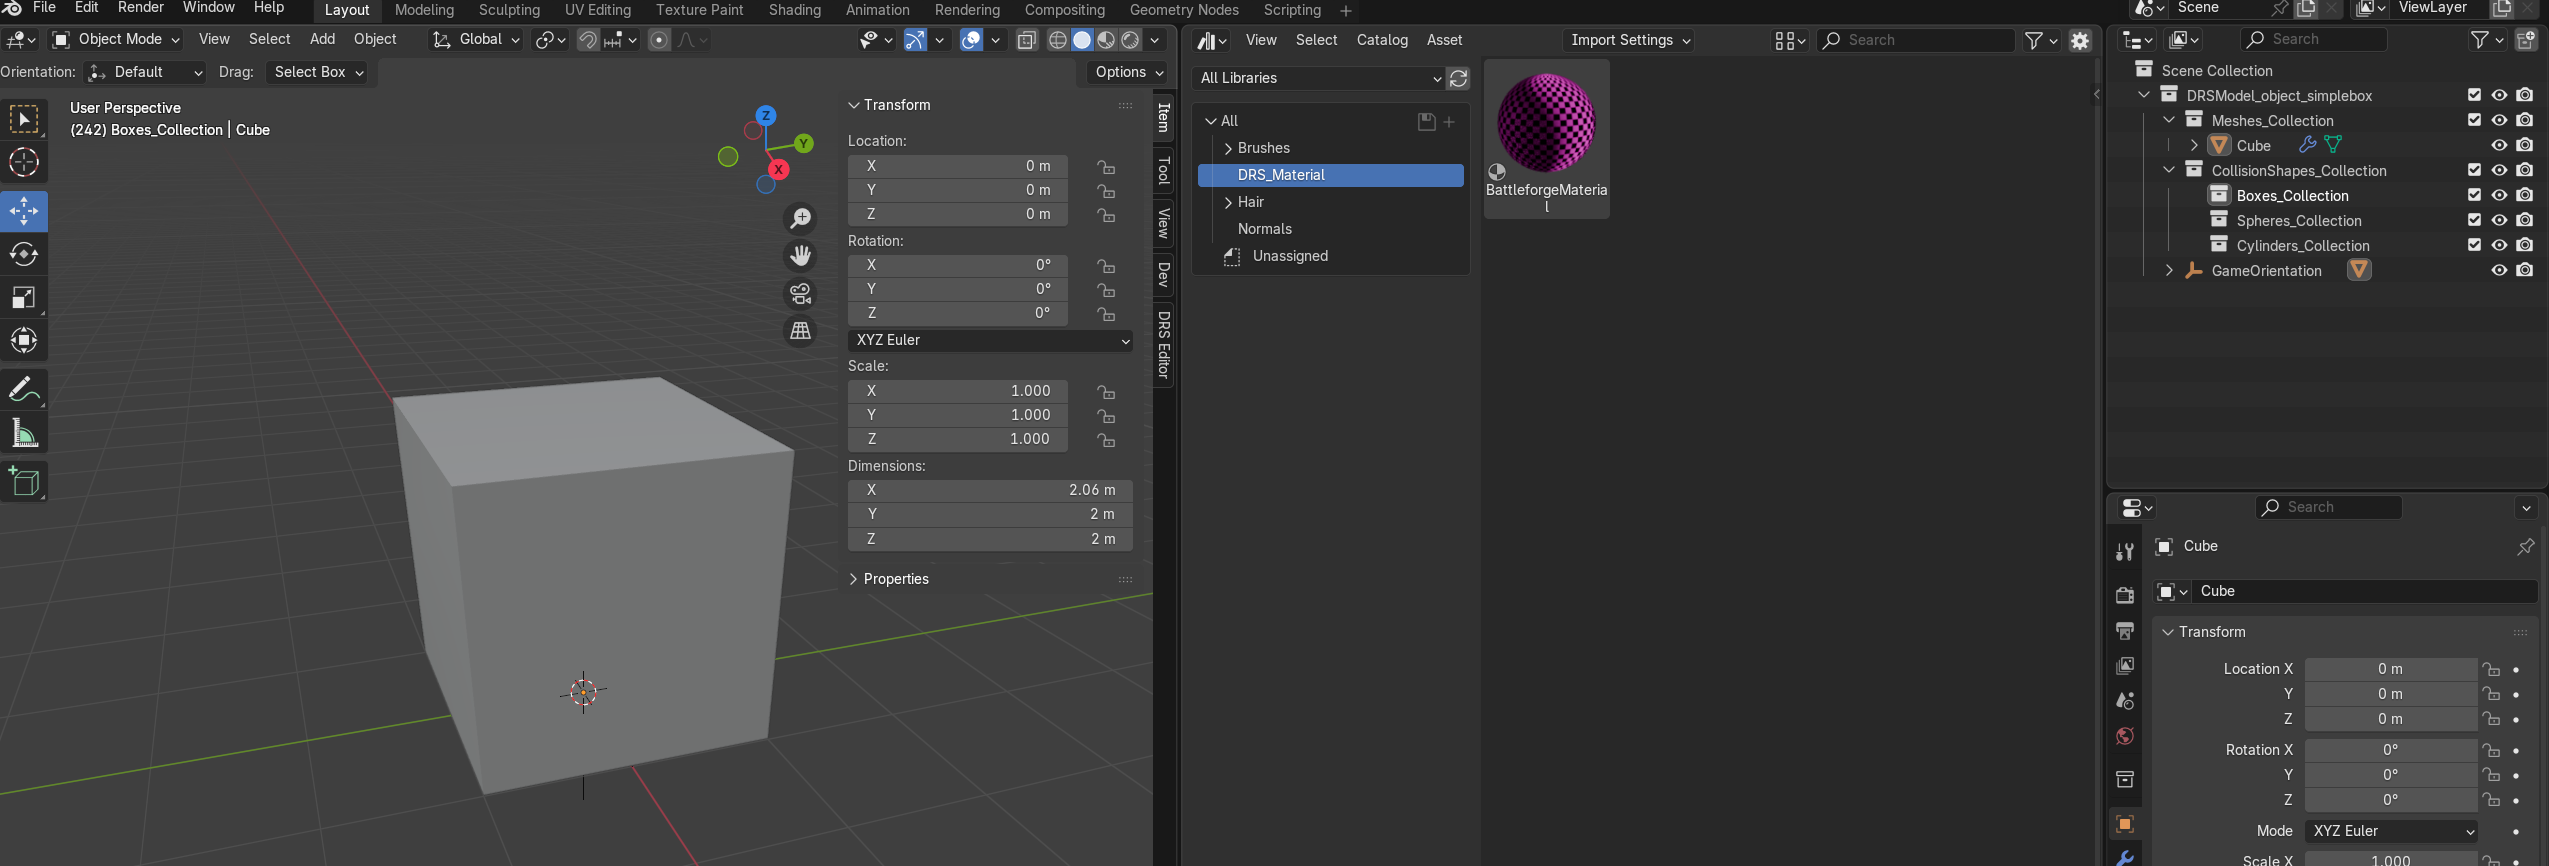
2. Understand the Collection Hierarchy
This creates a full collection hierarchy in the Blender Outliner.

The most important collections are:
DRSModel_object_CHANGENAME: Rename this by replacingCHANGENAMEwith your final model name.Meshes_Collection: Place your visible model mesh here.CollisionShapes_Collection: This contains the collision shapes later.
Tip: You can delete the default Blender collection with the camera and light, or simply ignore it.
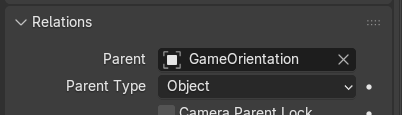
3. Parent the Mesh Correctly
This step is very important.
Once you create your first primitive mesh inside Meshes_Collection, set its parent to the GameOrientation empty. Select the mesh, then in the object properties under Relations set its parent to GameOrientation.
This is required because the empty stores the final in-game orientation, which is different from Blender's default orientation. If you forget this step or fix it too late, the model may end up misoriented in game.
4. Model the Object
Create and sculpt your object as needed. The actual modeling process is outside the scope of this guide.
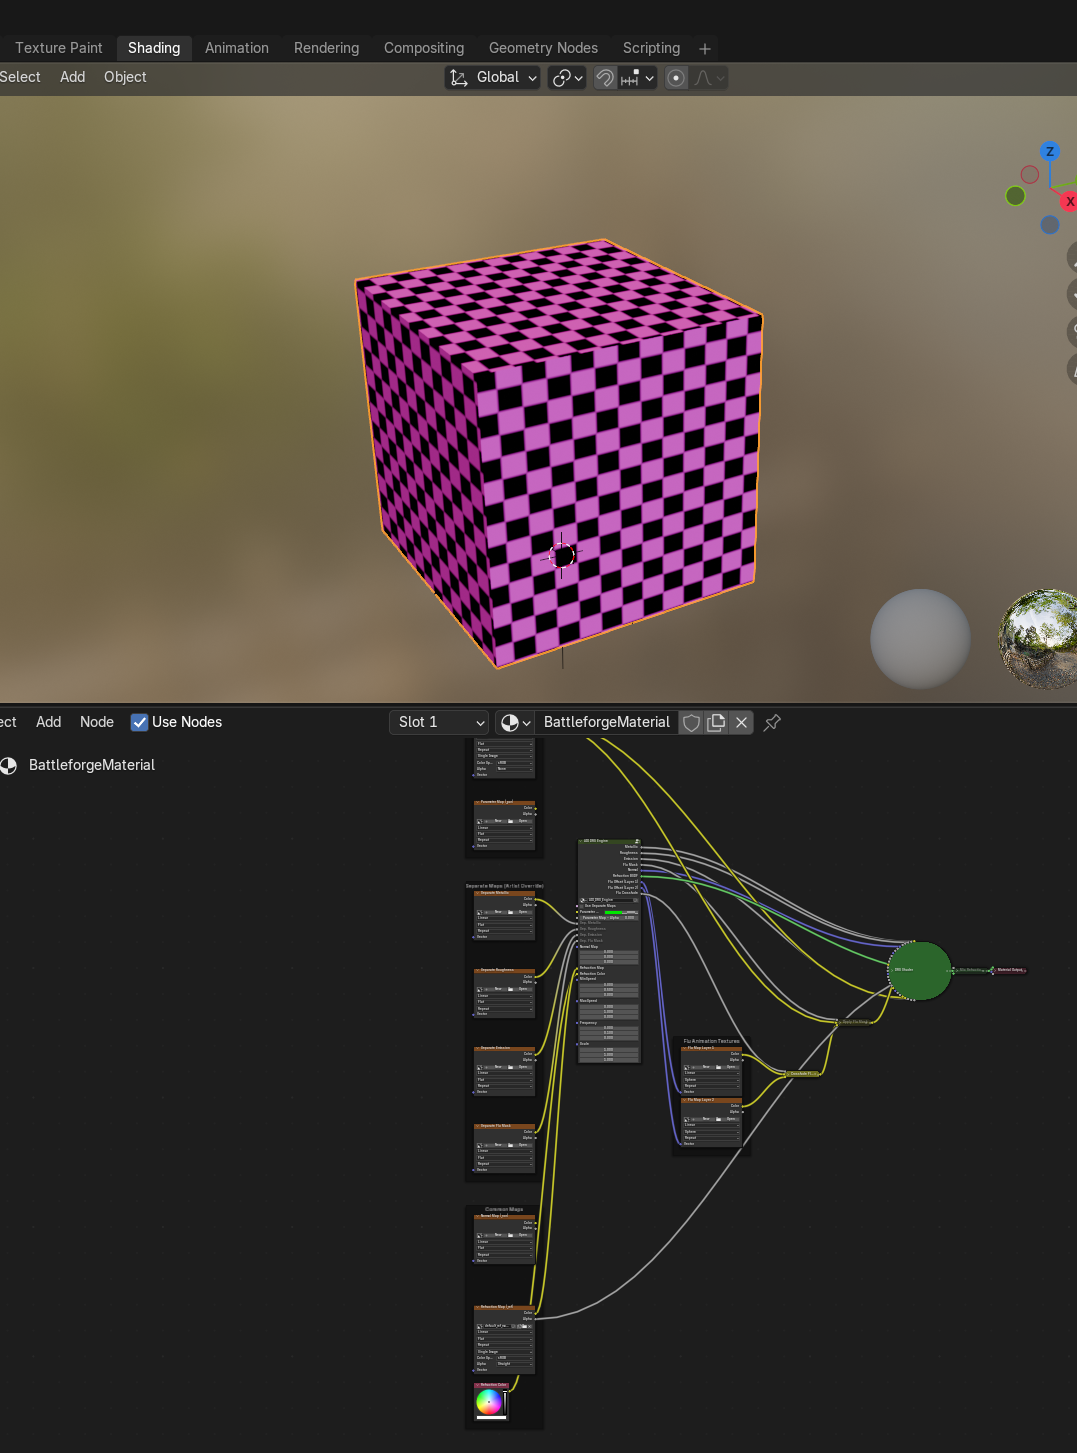
5. Assign the DRS Material
Once you are happy with the shape, the next step is setting up the material.
The plugin includes default assets for this. Open a second viewport and press Shift + F1 twice to open the Asset Manager. In the top-left area, switch to All Libraries and select the DRS_Material catalog. Then drag the DRS Material asset onto your model.
6. Set Up Textures
Open the Shading workspace, select your model, and use the shader editor to assign the textures.
You can set up:
- Color
- Metallic
- Roughness
- Normal
- Emission
- Refraction
- Fluid map
For more advanced setups, refer to the Advanced Shading Guide.
7. Open the DRS Editor Panel
Select your DRSModel_... collection in the Outliner. Then open the side panel in the 3D Viewport and find the DRS Editor panel.
For this tutorial, the two most important sections are:
Material FlagsWind
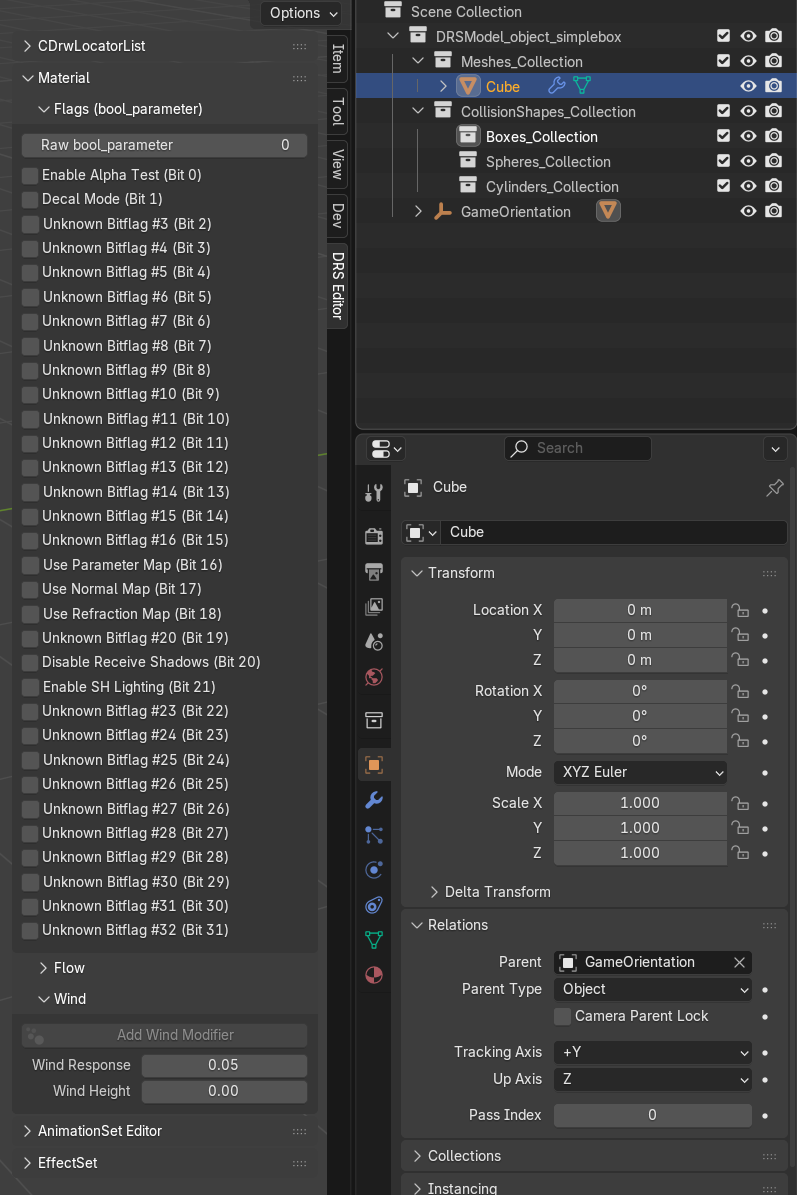
Material Flags
This section lets you enable important material features such as:
- Alpha test
- Parameter map usage for metallic, roughness, and emission
- Normal map usage
If you use any of those texture maps, make sure the corresponding flags are enabled.
Wind
This section controls how much the model reacts to wind and wave motion.
Wind Height: Defines the minimum height from which the wind effect starts. If set to0, the whole model is affected.Wind Response: Controls the wind strength.
0.1 is the highest supported value.
To preview wind in Blender, press Space to play the animation.
Tip: If the object was created from scratch, you may need to click
Add Wind Modifierfirst.
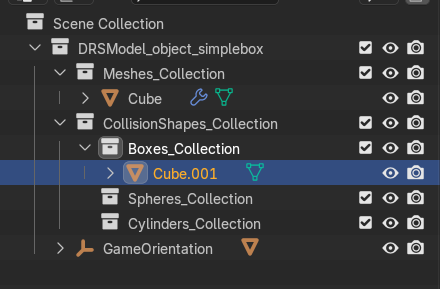
8. Create Collision Shapes
If your object needs collision, this is the final setup step before export.
There are three supported collision shape types:
- Box
- Sphere
- Cylinder
Create meshes in the correct collision collections and scale them until they match the model as closely as needed. You can combine multiple shapes to get a better fit, but in most cases 1 to 5 shapes are enough.
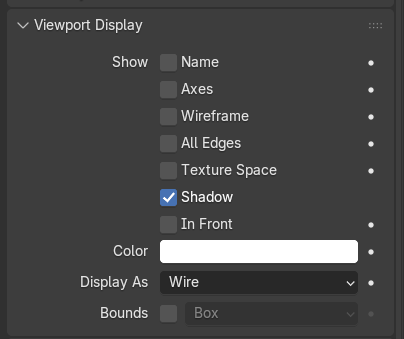
For easier fitting, select a collision mesh and go to Viewport Display, then set Display As to Wire.
9. Export the Object
Select the model collection in the Outliner, then go to File > Export > Battleforge object/unit.
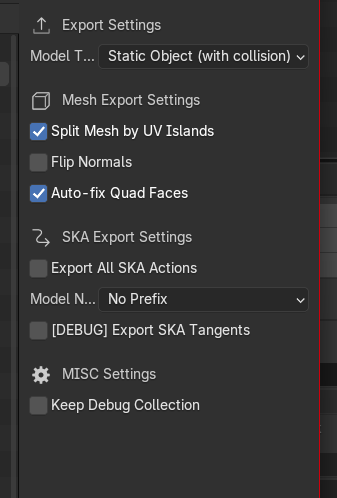
You will see several export settings:
Model Type: For this tutorial, select static object with or without collisions.Split Mesh by UV Islands: Leave enabled by default.Flip Normals: Enable this if the normals look wrong or the model appears partly invisible in game.Auto-fix Quad Faces: Leave enabled by default.Export all SKA Actions: Not needed here. Disable it.Model Name prefix: Not needed here.Export SKA Tangents: Not needed here. Disable it.Keep Debug Collection: Only useful for debugging.
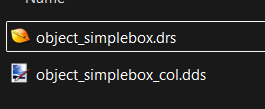
10. Final Export Result
After exporting, you should find the final .drs file together with the generated .dds textures in your export folder.